How I plan my quilts (Spoiler: I mostly don’t)
Over the years, I’ve often been asked how I plan my quilts. Do I have drawings? Do I plan my colours in general, or for the quilt blocks? What exactly is my design process?
The short answer is that I don’t plan, not really. Usually I pick a block design and figure out how many blocks to make for a certain size, then I sew enough blocks and arrange them into a pleasing (enough) design. I use what I have made and that's it. For smaller pieces, the designs tend to grow organically. In this post, I share four examples on my processes.
My whole work was based on a flimsy idea of the graphics used to describe dance steps. I’d also seen an image of a quilt where multicoloured and white strips alternated, and decided to use a similar approach for the surrounding area.
I had a vision of joyful, salsa-like colours and took out a bunch of suitable fabrics.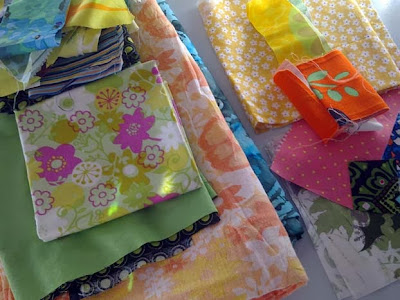 Then I made a drawing:
 I used the drawing as a template and cut out shoeprints from blue and red remnants, which I attached onto a backround fabric using fusible interfacing.
 The first framing strips were green.
 It was important that the strips would not look too uniform – yet the edges had to be straight. The ruler and cutter were constantly in use.
Because it was a lot of work to make the strips, I made them wider towards the outer edges.
It was important that the strips would not look too uniform – yet the edges had to be straight. The ruler and cutter were constantly in use.
Because it was a lot of work to make the strips, I made them wider towards the outer edges.
 The first picture of the surface. I must have taken the picture on an overcast day, or in the evening. Back in the day, my camera did not auto-correct, and many of the photos from that time are off focus.
 hen, the creation had to be quilted. I used small hand stitches to ensure that the shoeprints would not come loose. I also refined the heel area of the blue shoeprints with a few black stitches.
Then, I added the movement lines in black thread. Finally, I ran a machine stitch around the dance step area to make it stand out more. did not quilt the step area – only the movement lines – because I wanted to keep the area clean as a dance floor.
The next part was hard. I had no ideas on how to quilt the rest of the quilt. But because this was due for a competition, I had to quilt it.
For the first round of multicoloured strips, I used free-motion loops. Single-line loops did not fill the area enough, so I added echoing around the loops. It looked stupid but I went with it. n the white strips, I stitched a jumpy double line. I don’t know where that idea came from, but I was pretty happy with how this quilting style looked.
Even though I thought I had plenty of time to finish my mini quilt, time got the better of me. I had to work quickly and steadily, and could not stop even to take more pictures.
One of the multi-coloured strips got a stipple quilting. And I didn’t have time to stitch jumpy lines on the second round of white and had to settle with straight line quilting.
The sunny patch in the upper corner got its flame-shaped(ish) stitches in yellow and gold.
Even when I had completed the quilting, I still had to sew in a label, bind the quilt, and eeeugh – sew in the hanging sleeve. I barely made it before the final deadline: I posted the mini quilt to the competition on the very last admission date.
This was the only image I had of the finished quilt until I got it back waaay later – because my creation won second price, yayy! Here is a slightly better shot of this mini quilt that I called “Tico, tico!” You can see the rosette that it won – back in 2014.

 You may wonder how on earth anyone can come up with something that looks interesting to say the least! Here’s how:
I glance at the shelf where I’ve collected a small stack of scraps that are smaller than a fat quarter. The fabrics are all such that could be used together in a project. Oh look, there is a piece that is just the right shade of green. “Well, I don’t have the heart to use this lovely piece all up. Instead, I’ll use… this much” – streep [uses the rotary cutter].
”Gosh, here’s a piece of striped fabric on the table, I’ve left it lying about after I finished sewing the backing for the latest quilt. And orange goes here. It doesn’t go well but it goes. Once I add this piece, the green bit will be big enough for the purpose. I’ll just shorten it a little” – streep [uses the rotary cutter].
“There is a small bit of green fabric left. Oh there are these striped pieces on the table too! I’ll sew them together” – purr [sews on the machine].
“Darn, the piece isn’t tall enough. But this patterned fabric piece is rather wide, and just tall enough to even things out” – purr [sews on the machine].
”Why, the piece still isn’t tall enough. Do I have any strips left? Oh good, I do” – purr [sews on the machine].
”Groan, this can’t be true! I still need something to make this wide enough. Oh here’s a strip. But no, it doesn’t look good. However, if I turn it reverse side up, it looks much better. I’ll just use it” – purr [sews on the machine].
”And now that I have a leftover piece left from trimming, I’ll turn it into a pocket. I wonder… if this pile [leafs through a third stash pile on the sewing table] has a piece for the pocket lining … oh well this turquoise batik will have to do”.
I admit, this would have worked better as a video, but back in 2014, that just was not possible.
For my Gone with the Wind quilt, I made four blocks at a time – and implemented a few ideas on the fly, not having planned them at all. Firstly, the quilt was supposed to be sort of light blue, but other colours crept in.
Secondly, I decided that I would arbitrarily make the corners of some blocks bright red instead of black. I did not plan how many would be red – I trusted that I would be able to use all blocks in my final design. Thirdly, I had to add rather a wide border to make the quilt big enough (and avoid having to make more blocks than I felt like making).
And finally, to make the border more interesting, I continued the diamond shapes onto the border. The diamond shapes at the sides added a surprising amount of oomph to my quilt top! I named the finished quilt Gone with the Wind / Tuulen viemää because of the windy-looking quilting pattern that Soile in Töölön tilkkupaja implemented on the quilt. It is 135 cm x 179 cm in size (around 53" x 70,5")

Because I used the stitch and flip method to create the corners for the Gone with the Wind quilt, I ended up with quite a few bonus half-square triangles, which I later used for a large zippered bag: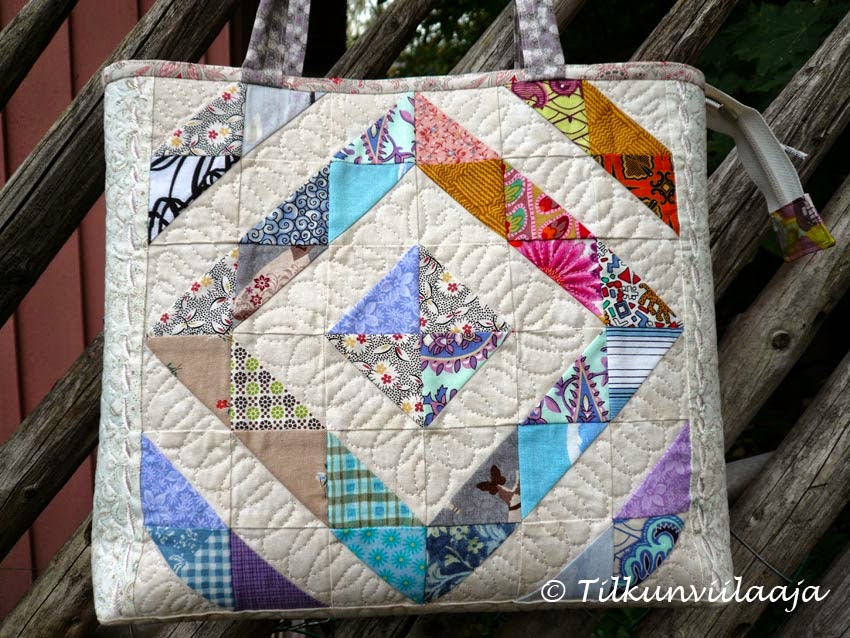 This is how most of my quilts come into life: starting from a vague idea and often shaped by the fabrics and colours that I happen to catch my eye. And even more often, inspired by the leftovers from other projects. For me, this is exactly what keeps quilting so interesting.
The short answer is that I don’t plan, not really. Usually I pick a block design and figure out how many blocks to make for a certain size, then I sew enough blocks and arrange them into a pleasing (enough) design. I use what I have made and that's it.

1. Starting with a flimsy idea
Here is an example or my creative quilting process from 2013 when I created a mini quilt for a competition. The theme was “Patchwork Dance”.My whole work was based on a flimsy idea of the graphics used to describe dance steps. I’d also seen an image of a quilt where multicoloured and white strips alternated, and decided to use a similar approach for the surrounding area.
I had a vision of joyful, salsa-like colours and took out a bunch of suitable fabrics.
Then, I added the movement lines in black thread. Finally, I ran a machine stitch around the dance step area to make it stand out more.
The next part was hard. I had no ideas on how to quilt the rest of the quilt. But because this was due for a competition, I had to quilt it.
For the first round of multicoloured strips, I used free-motion loops. Single-line loops did not fill the area enough, so I added echoing around the loops. It looked stupid but I went with it.
Even though I thought I had plenty of time to finish my mini quilt, time got the better of me. I had to work quickly and steadily, and could not stop even to take more pictures.
One of the multi-coloured strips got a stipple quilting. And I didn’t have time to stitch jumpy lines on the second round of white and had to settle with straight line quilting.
The sunny patch in the upper corner got its flame-shaped(ish) stitches in yellow and gold.
Even when I had completed the quilting, I still had to sew in a label, bind the quilt, and eeeugh – sew in the hanging sleeve. I barely made it before the final deadline: I posted the mini quilt to the competition on the very last admission date.
This was the only image I had of the finished quilt until I got it back waaay later – because my creation won second price, yayy!

2. Working with what I happen to have at hand
Next, I’ll tell you in detail how this piece came about:I glance at the shelf where I’ve collected a small stack of scraps that are smaller than a fat quarter. The fabrics are all such that could be used together in a project. Oh look, there is a piece that is just the right shade of green. “Well, I don’t have the heart to use this lovely piece all up. Instead, I’ll use… this much” – streep [uses the rotary cutter].
”Gosh, here’s a piece of striped fabric on the table, I’ve left it lying about after I finished sewing the backing for the latest quilt. And orange goes here. It doesn’t go well but it goes. Once I add this piece, the green bit will be big enough for the purpose. I’ll just shorten it a little” – streep [uses the rotary cutter].
“There is a small bit of green fabric left. Oh there are these striped pieces on the table too! I’ll sew them together” – purr [sews on the machine].
“Darn, the piece isn’t tall enough. But this patterned fabric piece is rather wide, and just tall enough to even things out” – purr [sews on the machine].
”Why, the piece still isn’t tall enough. Do I have any strips left? Oh good, I do” – purr [sews on the machine].
”Groan, this can’t be true! I still need something to make this wide enough. Oh here’s a strip. But no, it doesn’t look good. However, if I turn it reverse side up, it looks much better. I’ll just use it” – purr [sews on the machine].
”And now that I have a leftover piece left from trimming, I’ll turn it into a pocket. I wonder… if this pile [leafs through a third stash pile on the sewing table] has a piece for the pocket lining … oh well this turquoise batik will have to do”.
I admit, this would have worked better as a video, but back in 2014, that just was not possible.
3. Designing as I go
Another characteristic of my quilt making process is that I don’t cut out all of my pieces at one time. I usually design and sew only a few blocks at a time, then cut more pieces and design and sew the next couple of ones. I would get bored by repetition, so this way I avoid that.For my Gone with the Wind quilt, I made four blocks at a time – and implemented a few ideas on the fly, not having planned them at all. Firstly, the quilt was supposed to be sort of light blue, but other colours crept in.
Secondly, I decided that I would arbitrarily make the corners of some blocks bright red instead of black. I did not plan how many would be red – I trusted that I would be able to use all blocks in my final design.
And finally, to make the border more interesting, I continued the diamond shapes onto the border. The diamond shapes at the sides added a surprising amount of oomph to my quilt top!
4. Leftovers as a resource
This is an example of my process results when I use scraps and leftovers from recent projects.Because I used the stitch and flip method to create the corners for the Gone with the Wind quilt, I ended up with quite a few bonus half-square triangles, which I later used for a large zippered bag:
Comments